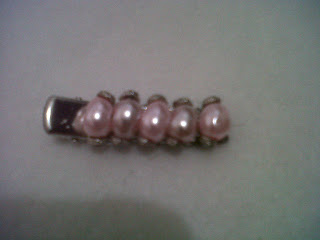
Changes are good, or so I thought. So, rather than having another ribbons for hairclip, this time I used fake pearls. Doesn't it look elegant?
You will need:
- Beads (I chose the pinky pearly ones). It was also the left-over from the time when I was so into beading (years ago). You could mix the beads as you like
- Hairclip
- Craft wire (you can use fishing thread too if you are not comfortable working with wire)
- Glue
 |
| Read it from upper left to upper right, then bottom right to bottom left |
How to:
1. Tie (wrap tightly and make a knot) the wire onto one end of the clip (the closed end)
2. Insert the bead(s) into the wire and wrap it around onto the clip. You can wrap one more time to secure the bead(s)
3. Repeat step 2 above for all beads until the length of clip is covered
4. Wrap at least 2 times around the clip (when all beads are in place) and make a knot to secure it. Cut short the rest of the wire
5. Glue a ribbon onto the inside of the clip (to cover the wiring)
Look! It's cute yet elegant, isn't it?


No comments:
Post a Comment