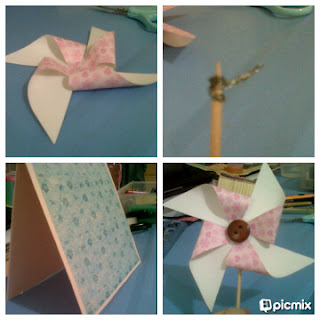
Last week, my girl had
homework, making a card. The card theme was about love and can be
given/addressed to anybody. So, together with my girls, we set on work. Here is
what we use:
o Lots of paper with different texture, thickness,
colour, etc
o Toothpick
o Art wire
o Decorative ornament
o Double tape (but you could use glue as well)
o Other helping tools such as scissor, ruler and
pencil
Ehm…some of you might
ask…why use pinwheel to express love. Well, children love pinwheel and I guess
we could use pinwheel to blow and scatter our love to our surrounding J
 |
| Step 1 - 6 |
How to make the pinwheel:
1.
Take a small
but quite thick origami paper (I used the Japanese theme with pinky love
pattern on it).
2.
Draw a line
from one corner to another (diagonally).
3.
Draw a small
circle in the middle of it.
4.
Cut the
diagonal line until the circle (4 lines)
5.
Use needle to
make a hole right in the middle of the circle and enlarge the hole a little bit
(you might want to help your kids on this step)
6.
Bring the
sharp corner (4 corners) onto the circle and fasten it using either glue or
double tape (remember not to close the hole – stick it somewhere near the hole)
7.
Fold art wire
few times (unless you are using the thick one) and wrap it around the
toothpick. Leave 1cm of the wire and cut another end properly. Be careful with
wire – it would be wise if this step is performed by parent
8.
Insert the 1cm
of the wire into the hole (from the back) and fasten it using some decorative
ornament. Remember, don’t fix glue the wire onto the pinwheel, just make sure
that the wire isn’t loose. If you fix glue it, then the pinwheel cannot move
and turning
How to make the card:
1.
Define the
size of your card (it should have adequate space after you attach the
pinwheel). Ours, is 15cm x 30cm
2.
Cut the card
and fold it properly
3.
Make another
square of 14cm x 14cm (we used tissue paper)
4.
Cut the tissue
paper square and stick onto the front-part of the card properly (use double
tape)
5.
Make another
rectangle of 15cm x 3cm and cut it (cut one long side using decorative scissors
to create a waving look)
6.
Stick it on
the bottom part of the card using double tape
7.
Stick the
pinwheel onto the card using double tape (stick it over the waving paper)
8.
Make another
rectangle again of 15cm x 1.5cm and cut it (cut one long side using decorative
scissors)
9.
Stick it over
the pinwheel (on the bottom part of the card) using double tape
10. Cut some clouds (or you could use some stamps if
you have any) and stick it using thick double tape to create the 3D look and
feel
11. Decorate the card as you like…it’s the fun part of
it *grinning*
It’s pretty easy for
children to make it by themselves right? Ah…don’t forget the envelope J


No comments:
Post a Comment