Showing posts with label Sewing. Show all posts

Monday, November 12, 2012

Handmade Ruffle Tote Bag - Another Sewing Project


Another bag that I like from www.makeit-loveit.com is the 
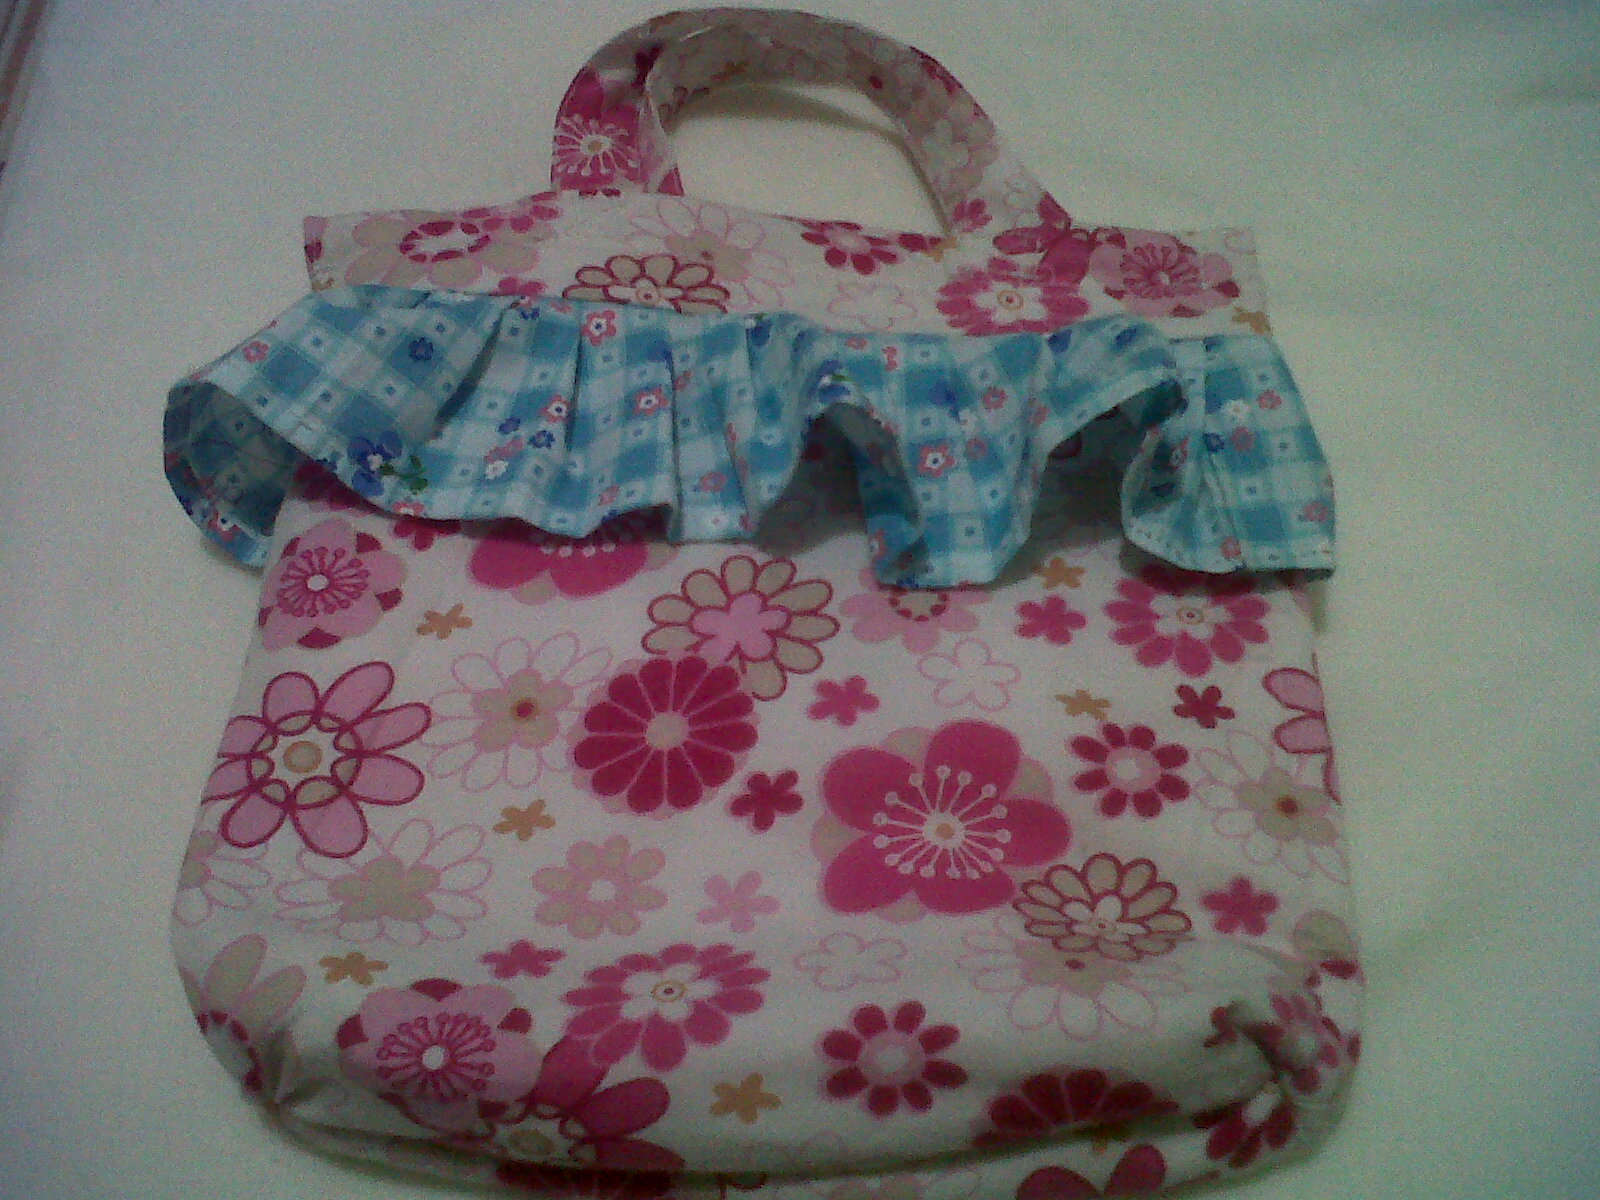
tote bag. I liked the design a lot and I thought it would be a great art-n-craft bag for my girls (hers was torn already phewww). Again, I copied the design however I didn’t follow her instruction. I used mine instead (for 
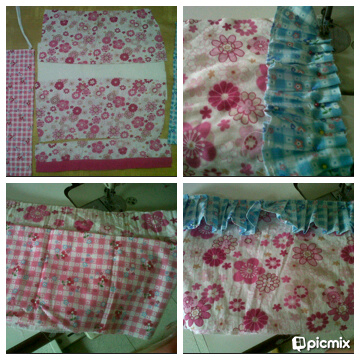
me…it was easier). For this project, I used my girl’s old cloth which the material and colour were still in good condition.
Pardon the mix-matching, i used any old clothes available on hand

How to (if you are confused, pls kindly refer to the detailed explanation on the above site:
Step 3 - 5

1.      I draw the design first, the outer look and the inner side. Since my girls have lots of stuff, so I want to have small pockets inside the bag
2.      I make the prototype patterns. For this bag, I need:
a.      1 zipper
b.      2 rectangles for outer and inner part with dimension of 25cm x 60cm
c.       Another 1 rectangle for inside pocket with dimension of 20cm x 60cm
d.      1 rectangle for the top part with dimension of 10cm x 60cm
e.      1 rectangle for ruffle with dimension of 10cm x 100cm
f.        2 rectangles for handle with dimension of 8cm x 40cm (you could make the length longer or shorter, depends on your design)
Step 6 - 8

3.      Then I draw on the cloth and cut it out
4.      I sew the ruffle onto the top of the outer rectangle
5.      I sew the inside pocket onto the inner rectangle
6.      Then sew the sides of inner and outer rectangles altogether
7.      Sew the bottom part properly
8.      Sew the top part onto the ruffle (to tidy up the ruffle part)
9.      Sew the zip onto the top part
10.  Sew the handle rectangle sides (the length ones) together. Do it for another rectangle. Then turn inside out
11.  Sew the handle onto the top part of the bag


TADA…now my girls have this lovely art-n-craft bag J

Wednesday, November 7, 2012

My 1st Sewing project


I was supposed to publish this post first...but instead, i published the 2nd post. No problem though...but this one is about when I started to learn sewing using the sewing machine. I would like to make a car seat cover for the front seat…since I always put my girls’ trolley school bag there. And, most of the time, the wheels of the trolley leave dirt and dust on the seat. Since my car seat is not covered in leather (I hate the smell he he he) so it is quite difficult to clean it up. Therefore, I made this seat cover to protect it.
Now...driving under the scorching sun doesn't matter anymore
At first, I sew manually by turning the side wheel of sewing machine (it was such a labor work). I spent nearly 15mins only to sew about 15cm phewww…and seeing that I still had lots to sew…finally I braced myself and switched the machine on. It hums pretty loud (I didn’t know whether it is normal or not) and slowly I nudged the pedal using my toe only. It didn’t move...only the humming was getting louder. I gave up…I press lightly onto the pedal and it moved YAY….yippey….:-D

Slowly…an inch by an inch…I managed to sew the cover perfectly. Well, it was a bit messy but what the hell…it was my first time and I was so proud when I finished it (I kinda felt like a supermom who could take up any challenge LOL). And since I can sew, lots of ideas popped up in my mind..i wanna make this and that and many moreeee   :-D
The car-seat cover made from felt
So the first thing that I made after the seat cover was long sleeve gloves. I have mine, bought it from the Sox galleries... but since my skin is pretty sensitive...these sleeves feel uncomfortable and itchy. I rarely used it and now my arms have gotten some tan color compared to other parts unexposed to the sun. So, i made my mind to sew these long sleeves myself (scorching sun motivated me a lot LOL). I cut it out from my old bolster case and used simple design as well (well, an amateur couldn’t go into a complex design yet). Beside cloth, I used rubber band (for cloth – not hair).

How to:
1.      Measure the width and length of your arms (from upper arm to your fingers).
2.      Draw 2 rectangles onto the cloth (or you could make a pattern before). My dimension is 35cm x 55cm
3.      Cut the pattern
4.      Measure and cut the rubber as well. Mine is 15cm for wrist (2 pieces) and 25cm for upper arm (2 pieces)
5.      Sew the edges (the width) of both rectangles
6.      Sew the wrist rubbers onto the rectangles (about 10cm from the edge)
7.      Sew the upper arm rubbers onto the rectangles (about 5cm from the edge)
8.      Sew the edge (the length) of both rectangles

Now you have long gloves that are comfy for driving J

Wednesday, October 24, 2012

My 2nd Sewing Project - Simple n Easy Bag

Like I told you last week, I was so into sewing nowadays so I spent almost all-of-my-me-time sewing various kinds of things. After success in sewing the gloves, now I made a very simple bag. I copied the design and followed the instruction from www.makeit-loveit.com (I love this site – lots of tips for art and craft). Since I still had the left over bolster sheet from my gloves…so I used it with a yard ribbon.


How to (if you are confused, pls kindly refer to the above site for more detail explanation):
1.      Draw 2 rectangles (let say A and B) with dimension of 35cm x 30cm and cut it (if you aren’t sure…you could draw it on the paper as the pattern first)
2.      Cut 2 pieces of ribbon with a yard long
3.      Sew the long sides of both rectangles together (do it inside out) but leave 5cm at the bottom part and 7cm at the top part
4.      Sew the top side (the 7cm one) separately (don’t sew the top sides of A and B together). Make sure, you have some space to insert the ribbon
5.      Turn inside out and insert 1 ribbon from rectangle A and continue to rectangle B. While insert another ribbon from rectangle B and continue to rectangle A.
6.      Tidy up the loose ribbons and turn the bag inside out again
7.      Sew the ribbons onto each side of the bag (at the 5cm part)
8.      Then sew the bottom of the bag

Now you have this simple yet easy bag…my girls are using it to put their aikido outfit J